In our last post, we revisited the past. This cramped, dark, icky kitchen past:

Original kitchen.
Let’s continue with our recap. Some of this you’ve seen before, but I’m including a lot more detail about each step along the way.
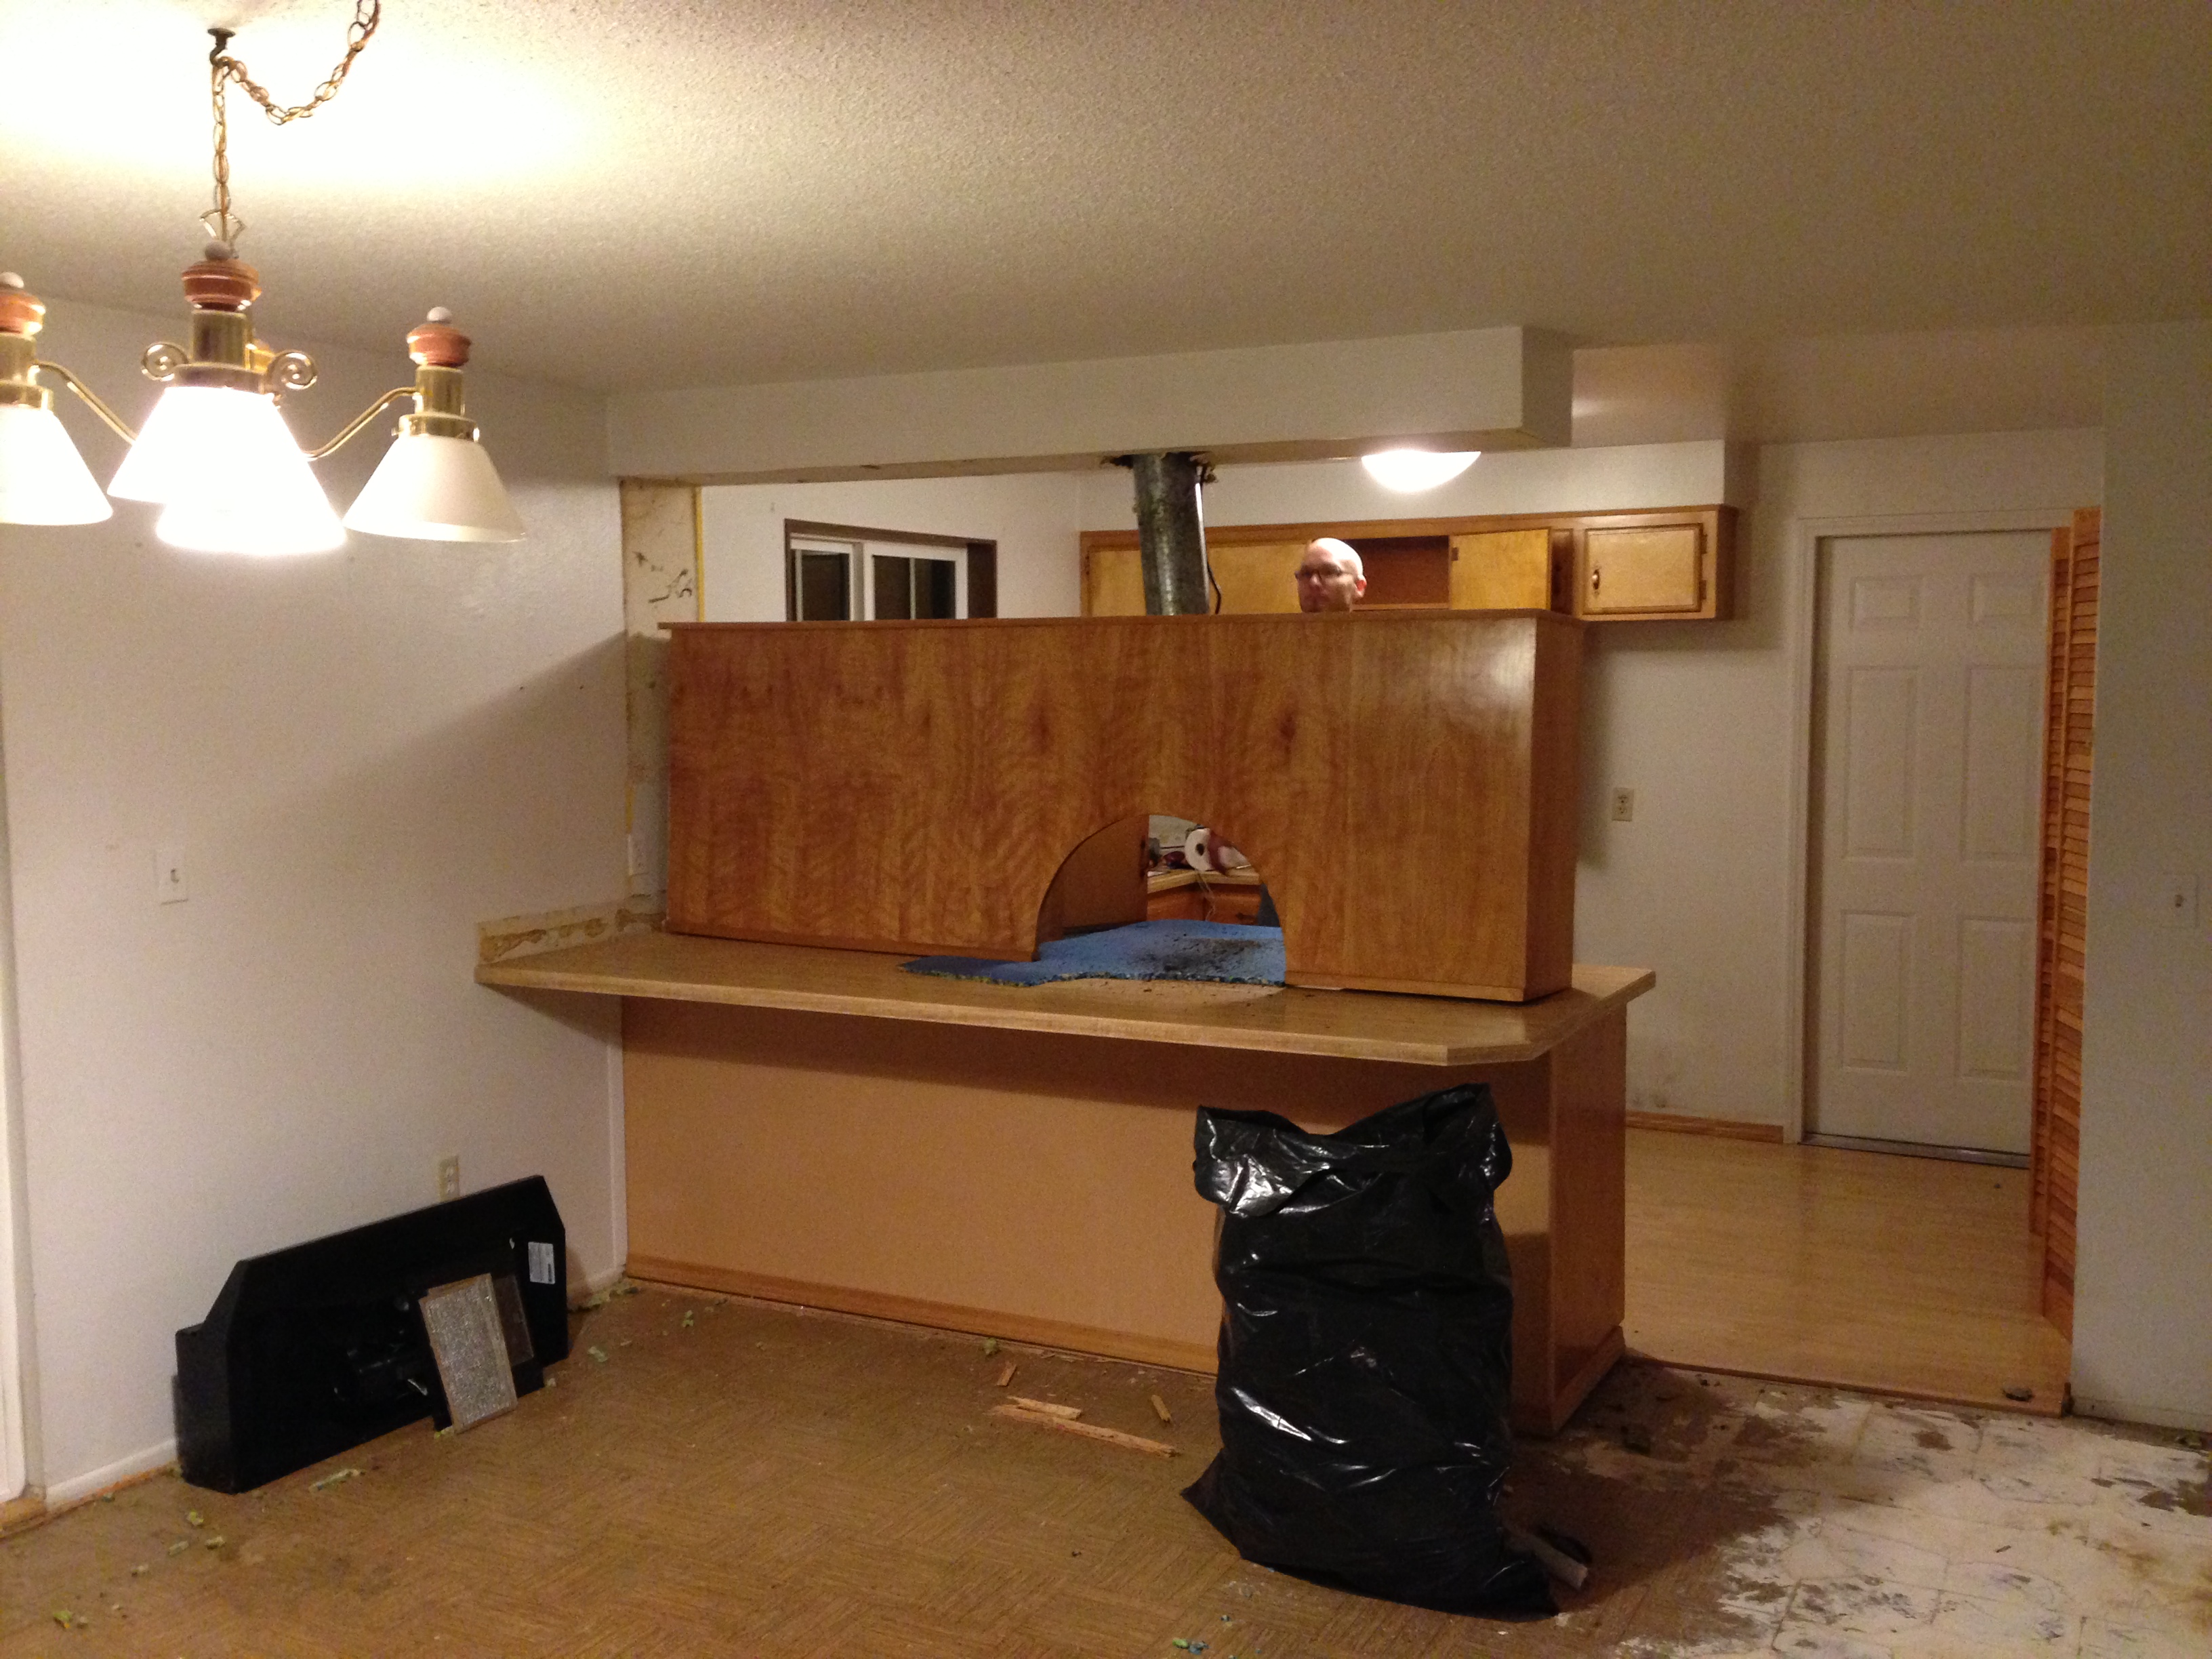
On Demo Day, the mister and I brought our face masks, work gloves, crowbars and enthusiasm, ripping up carpet and tearing into the cabinetry. Those uppers were fun — after briefly pondering how heavy those suckers would be, we pried them loose from the soffit and brought ’em down. That’s the range hood duct sticking up through the middle. The spouse had to go into the attic to pull it up and out.

One set of uppers comes down!
And here ’tis. Our very first, early glimpse toward a more open kitchen. Do we have vision? Looking back at this moment, I’d say heck yes. And it’s a good thing. Our family must have thought we were insane.

Range hood duct and uppers removed.
At this point, we found a contractor to help us out a bit. We still had a major hand in demo, but they were able to bring a) tons of tools and a huge debris trailer; b) relationships with local subcontractors — remember, we were completely new to town and leery of trusting craigslist referrals with our new baby; c) an understanding of the process (I think we would have frozen if we’d had to make some of bigger decisions on our own); d) an architect who helped us gain important inches here by stealing from there (and who confirmed things like load bearing walls, etc.). It was awesome getting an architectural rendering of our house, not to mention having our vision heartily endorsed by a professional.
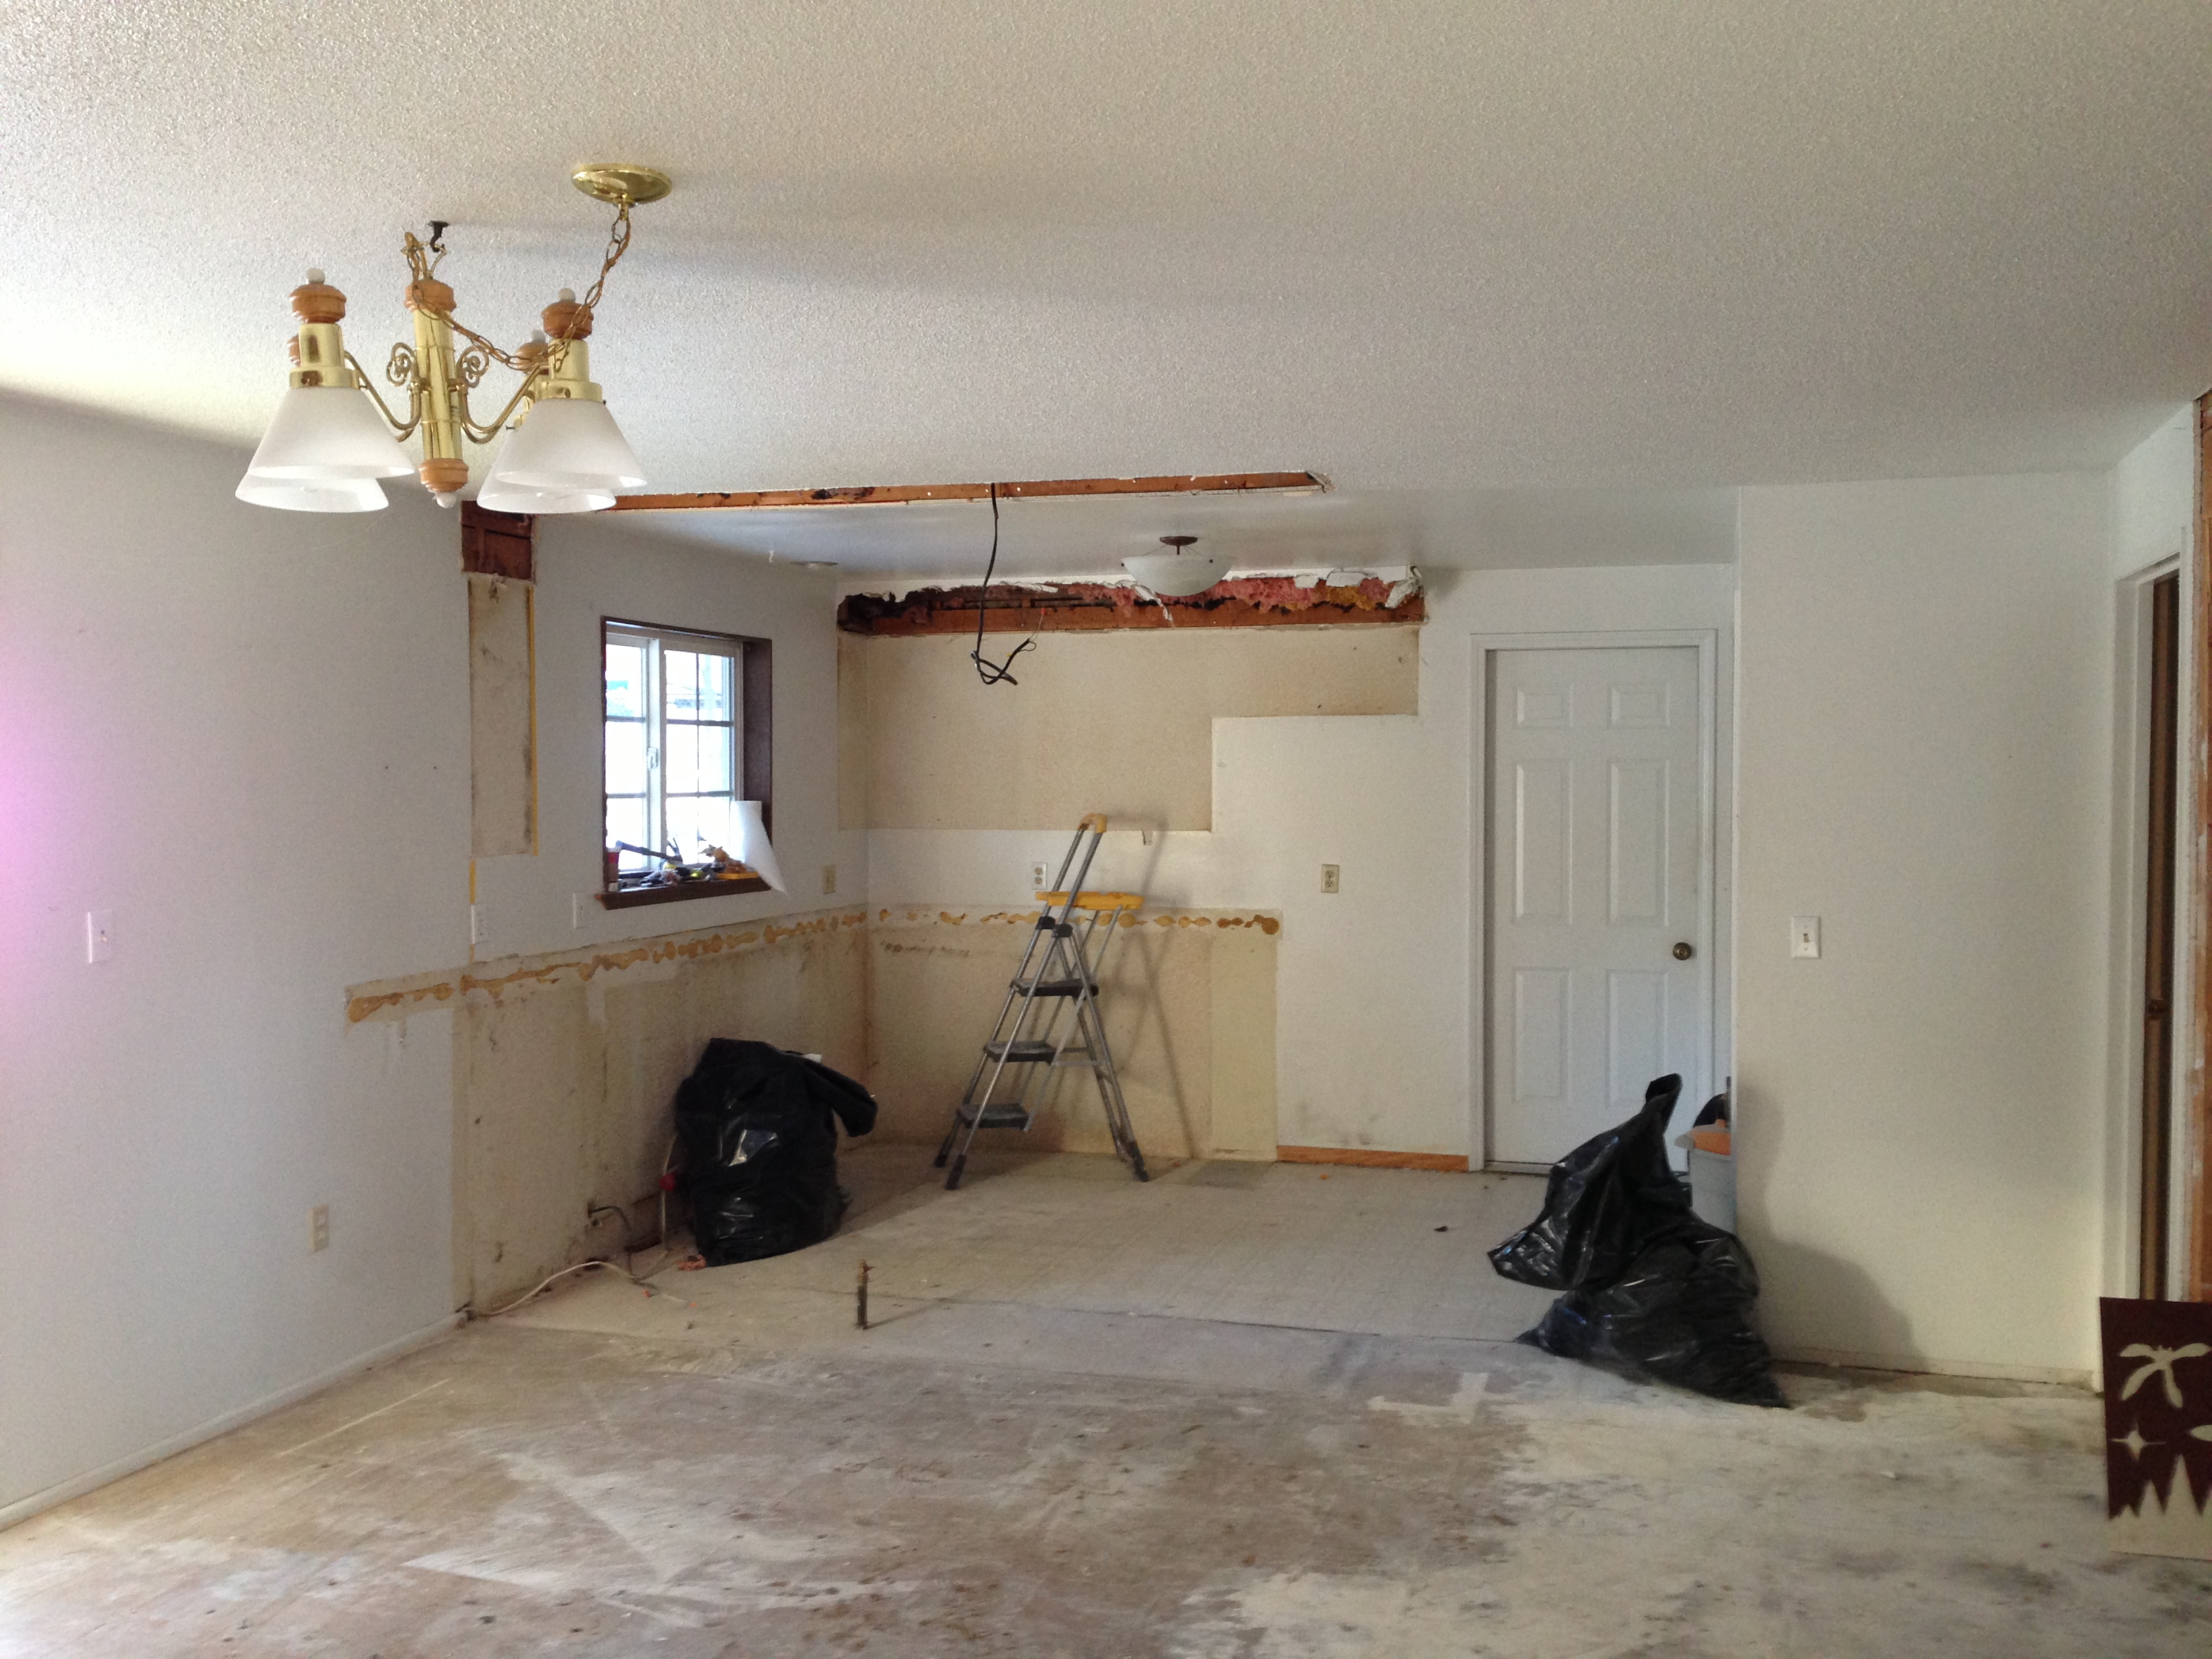
Anyway — this is what it looked like with demo 100% complete. Did we remove those soffits? Yes we did! See all that pink insulation and wiring hanging from the gaping holes in our ceiling?

Demo is complete.
This is where things seemed to slow way down. And get expensive. The plumber was called in to scoot the kitchen sink to the left and move the gas line to the back wall, plus do a whole crap ton of work on other projects I’ll cover later (a bathroom that is at present plumbed but still gutted, and a laundry closet situation).
Meanwhile, “the guys” were tearing out closet walls, reframing and moving doors for the other projects I’ll get to later, and generally making it possible for us to, you know, keep our jobs.
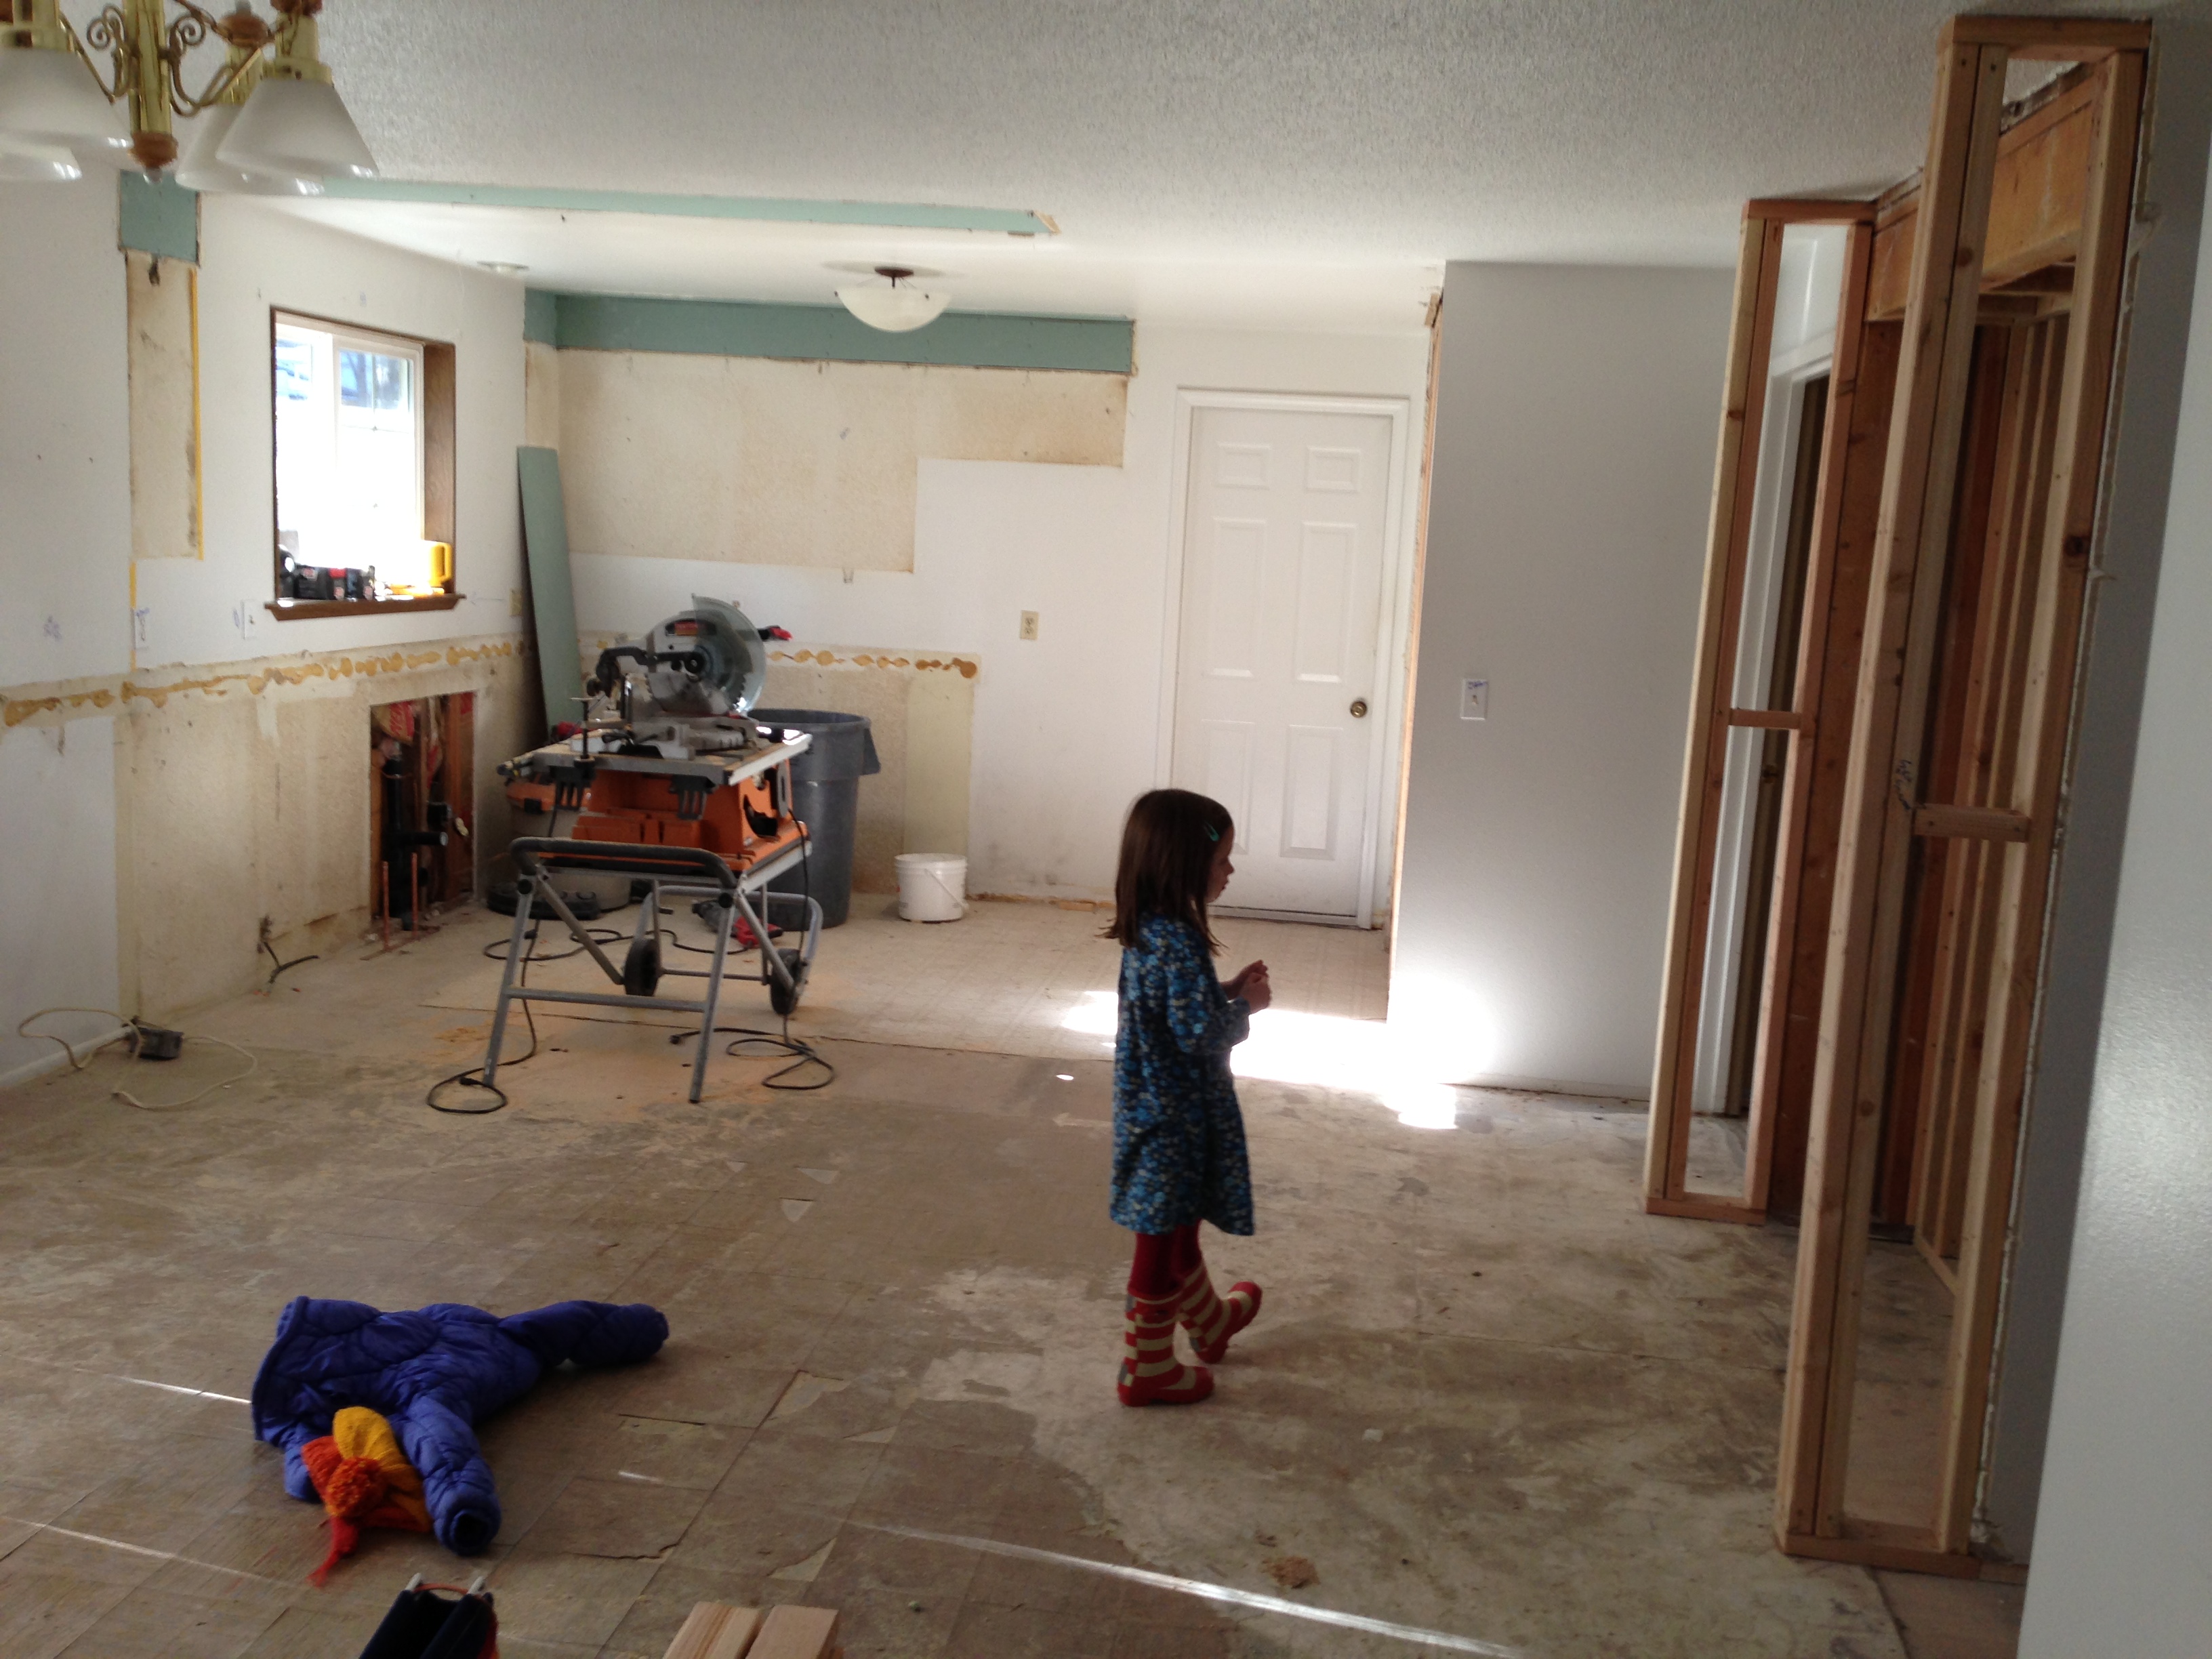
There was some drywall repair work. Which got us to this:

Drywall and ceilings repaired from demo work; framing for kitchen desk at right. The kid, massively skeptical that we could ever possibly live in this place.
Then the electrician. We spent an hour drafting up our dream plan in a consult — three-way switches here, dimmers there, outlets in the most gracefully convenient locations, can lights. [bbrrrrippp! That’s a needle screeching on a record, holy $@*^ electrical is expensive.] We modified those plans dramatically when the estimate came in. And the spouse took on a huge, technically complex project involving VOLTAGE. [Correction: spouse tells me it’s the amps that are scary. See? Technical.] Late at night. By himself. Mostly in a dark attic crawlspace filled with fiberglass and bird skeletons.
He mapped the entire circuitry of the house, planned electrical loads, ran wire, installed boxes, and a whole bunch of other stuff I didn’t understand and that freaked me right the hell out. (Most of this happened in the Mystery Bathroom I haven’t showed you yet.) He’s very, very technically inclined and deals with circuits, in a way, in his profession. I believed in him entirely. I also made sure our life insurance policy was up to date.
When he was done, the certified electrician came back and did his thing throughout the house, including installing the kitchen can lights. And discovering that the off-center, atrocious can light over the sink? Couldn’t be centered, because there’s a ceiling joist in that exact spot. Cue hand waving and weeping into the couch cushions.
I cried and yelled a lot during this phase. And pinned things on Pinterest and IMed my best friend for martini recipes. Wasn’t I ever so useful? Yay, me. Yes, this was probably the most stressful point in the project — both due to the cost and that it required a lot of trust between everyone involved.
So. Demo, plumbing, drywall, electrical: done. Next, it was time to tape, mud, sand, and prime. Oh, sweet and happy day, when the primer was done. It started to look like a room again:

Drywall taped, mudded, sanded and primed.
I have some masons in the ancestry on my Italian side. Maybe that’s why my affections ran deep for Tony the Texture Guy (and Aaron the Tile Guy — he comes later). Tony brilliantly, expertly covered the popcorn ceilings in the dining room with skim coat. It’s gorgeous. You would never know what’s under there. He also made the walls look seamless.
And then — our contractors were supposed to use the lightest possible orange peel for a final spray of wall texture, and we were dismayed to discover they used something higher profile — it’s rougher, for sure. I still notice it when I think about it, but in the scheme of things we had to let it go. Our timeline didn’t allow for sanding the entire house.
Once texture was done, we chose wall paint and had the whole house sprayed — so, so much faster than rolling it ourselves. (We had to do a LOT of painting anyway. Trim, baseboard, some extra coats here and there, new color in the kid’s room.) The color is Sherwin Williams West Highland White.
We also hired out the wood floor installation. We thought long and hard about this, considered click-lock flooring to make it easy, but finally decided it was really important to get it done right, and get it done quickly. You might remember how I felt about the floors the first time I saw them. Update: the contrast is mellowing with exposure to light, and my attitude is mellowing with time.
Which brings us to this view:

Popcorn ceiling and soffit hole repairs beautifully covered with skim coat. Walls primed and painted. Engineered maple floors installed.
It was time to bid adieu to The Guys. They cleaned up and cleared out, hugs shared all around. That was the moment when the house felt like ours. Not unlike that moment when the hospital sends you out the door with a two-day old baby. Terrifying and exhilarating. Because holy crap now we have to take care of this thing and ohhhh isn’t it the prettiest thing ever?
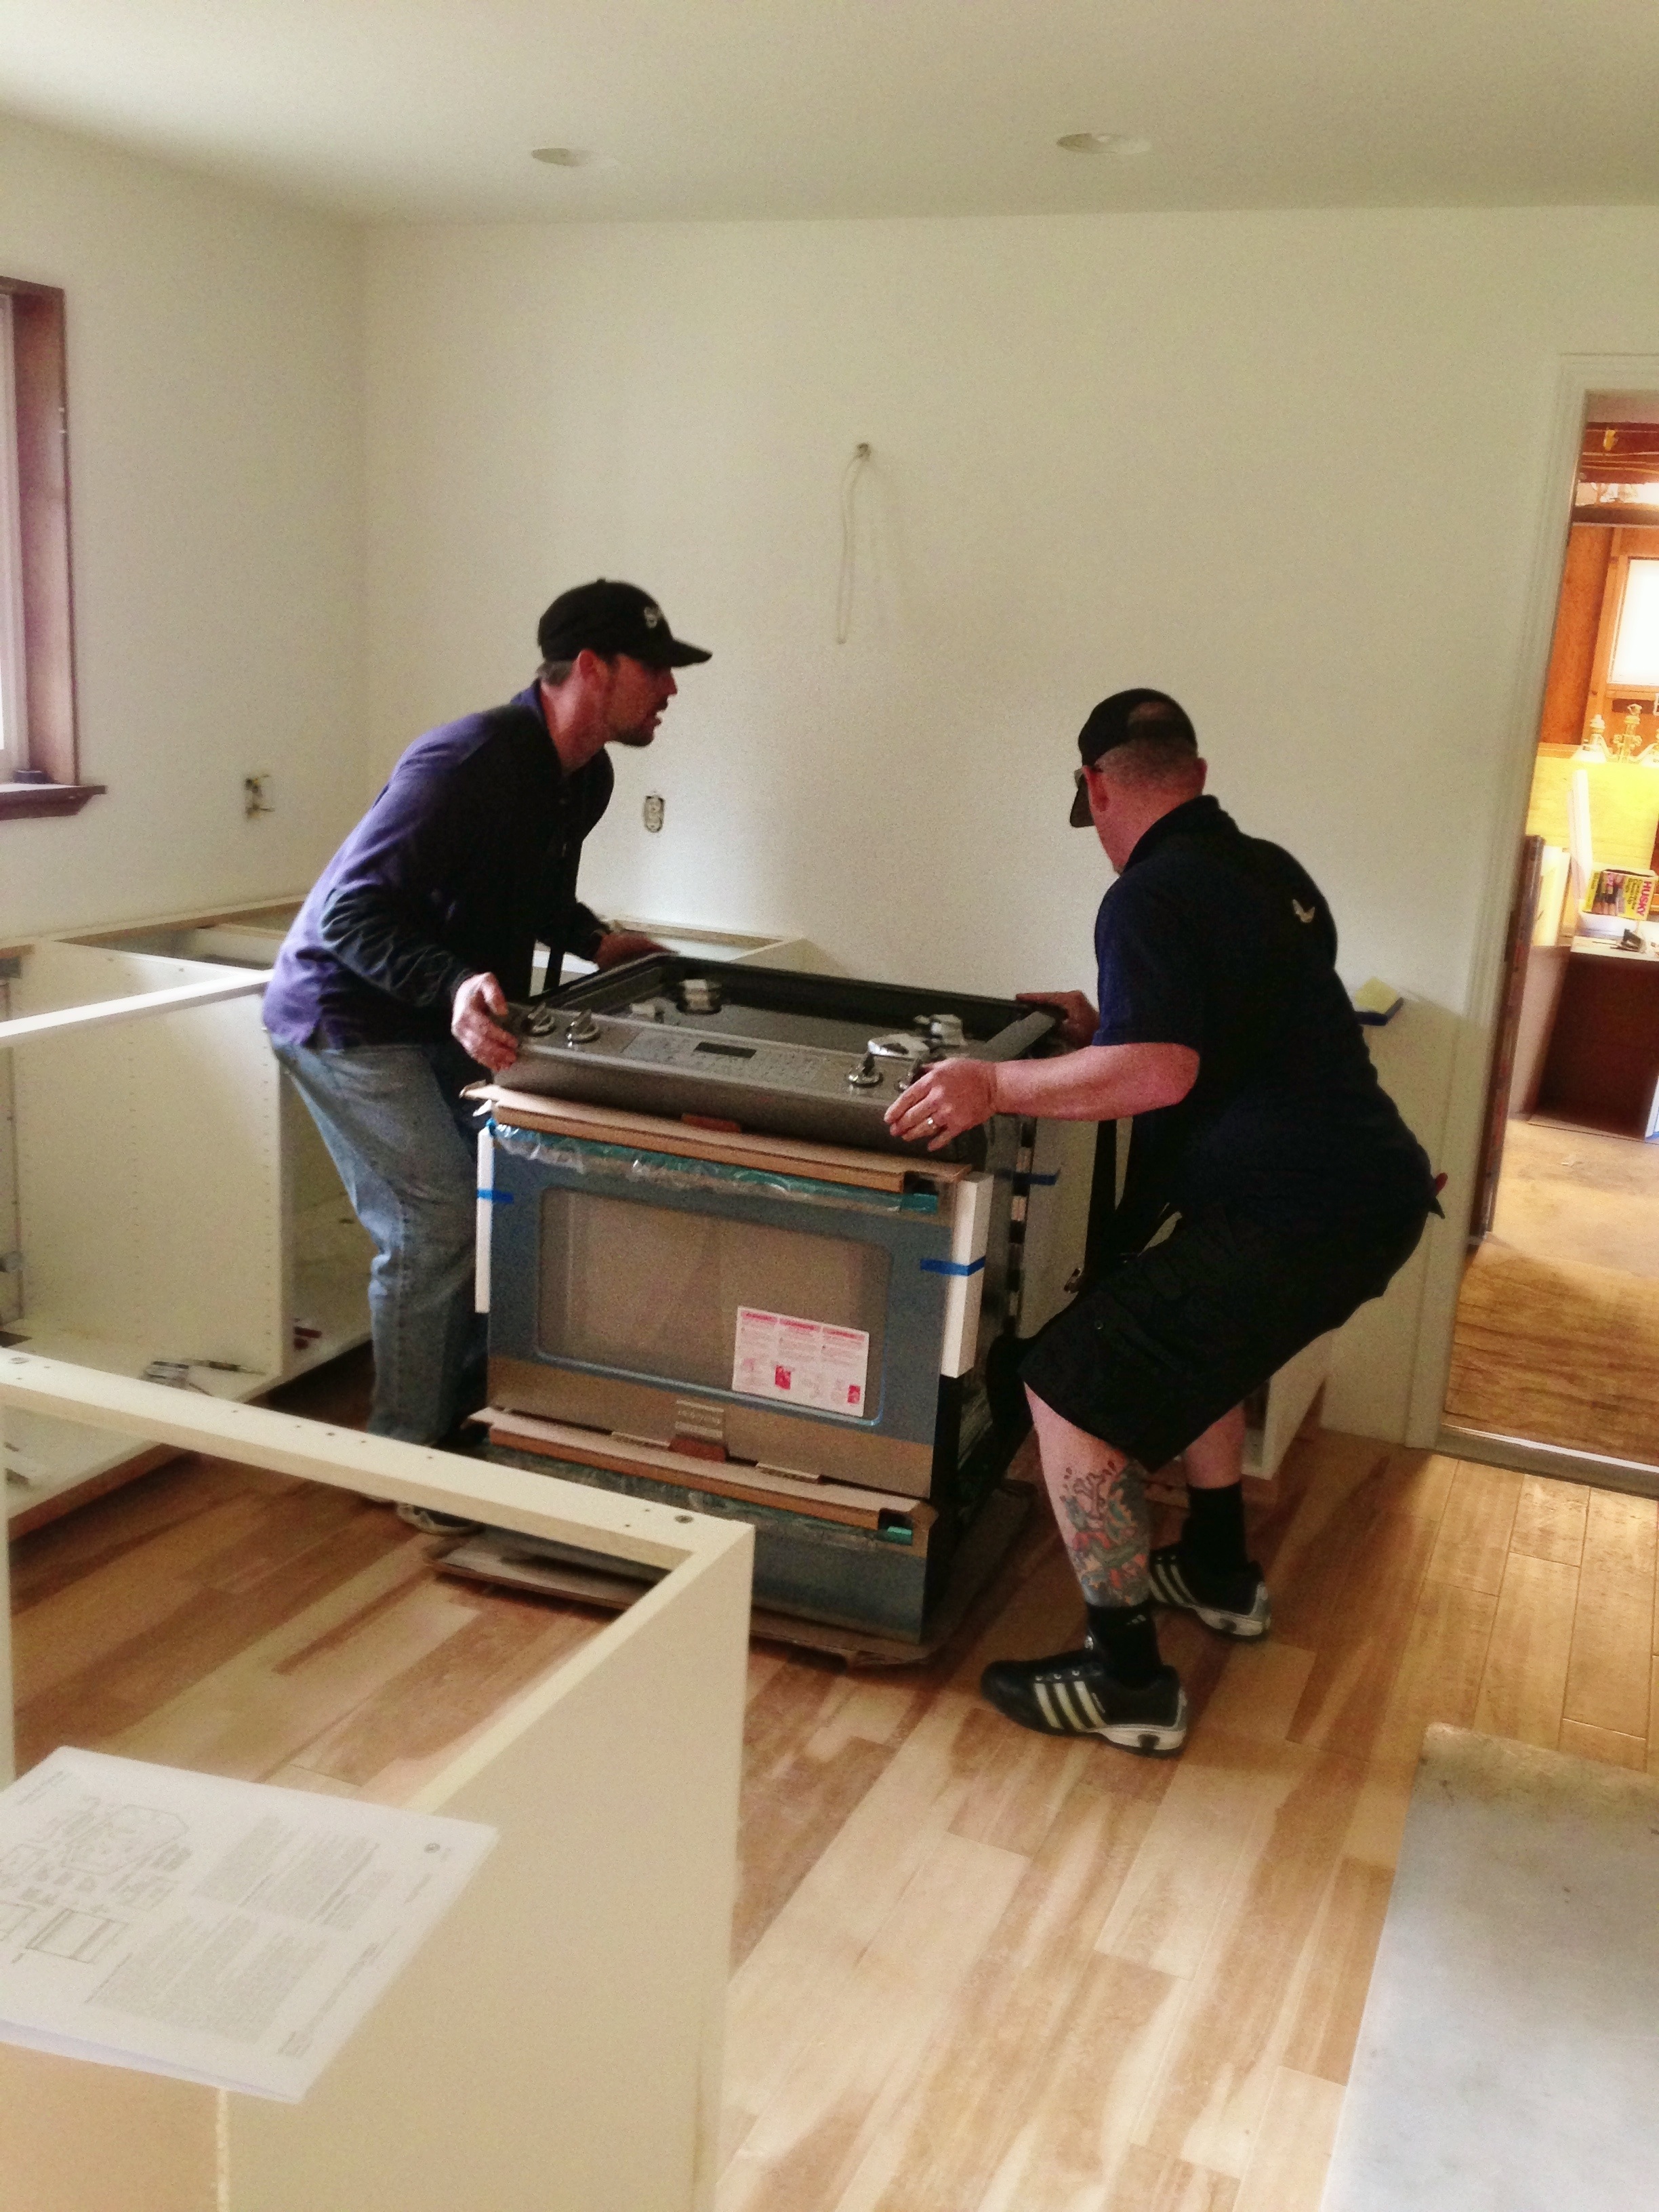
Somewhere in there, our beautiful suite of Frigidaire appliances was delivered. It was time to give them a real home.
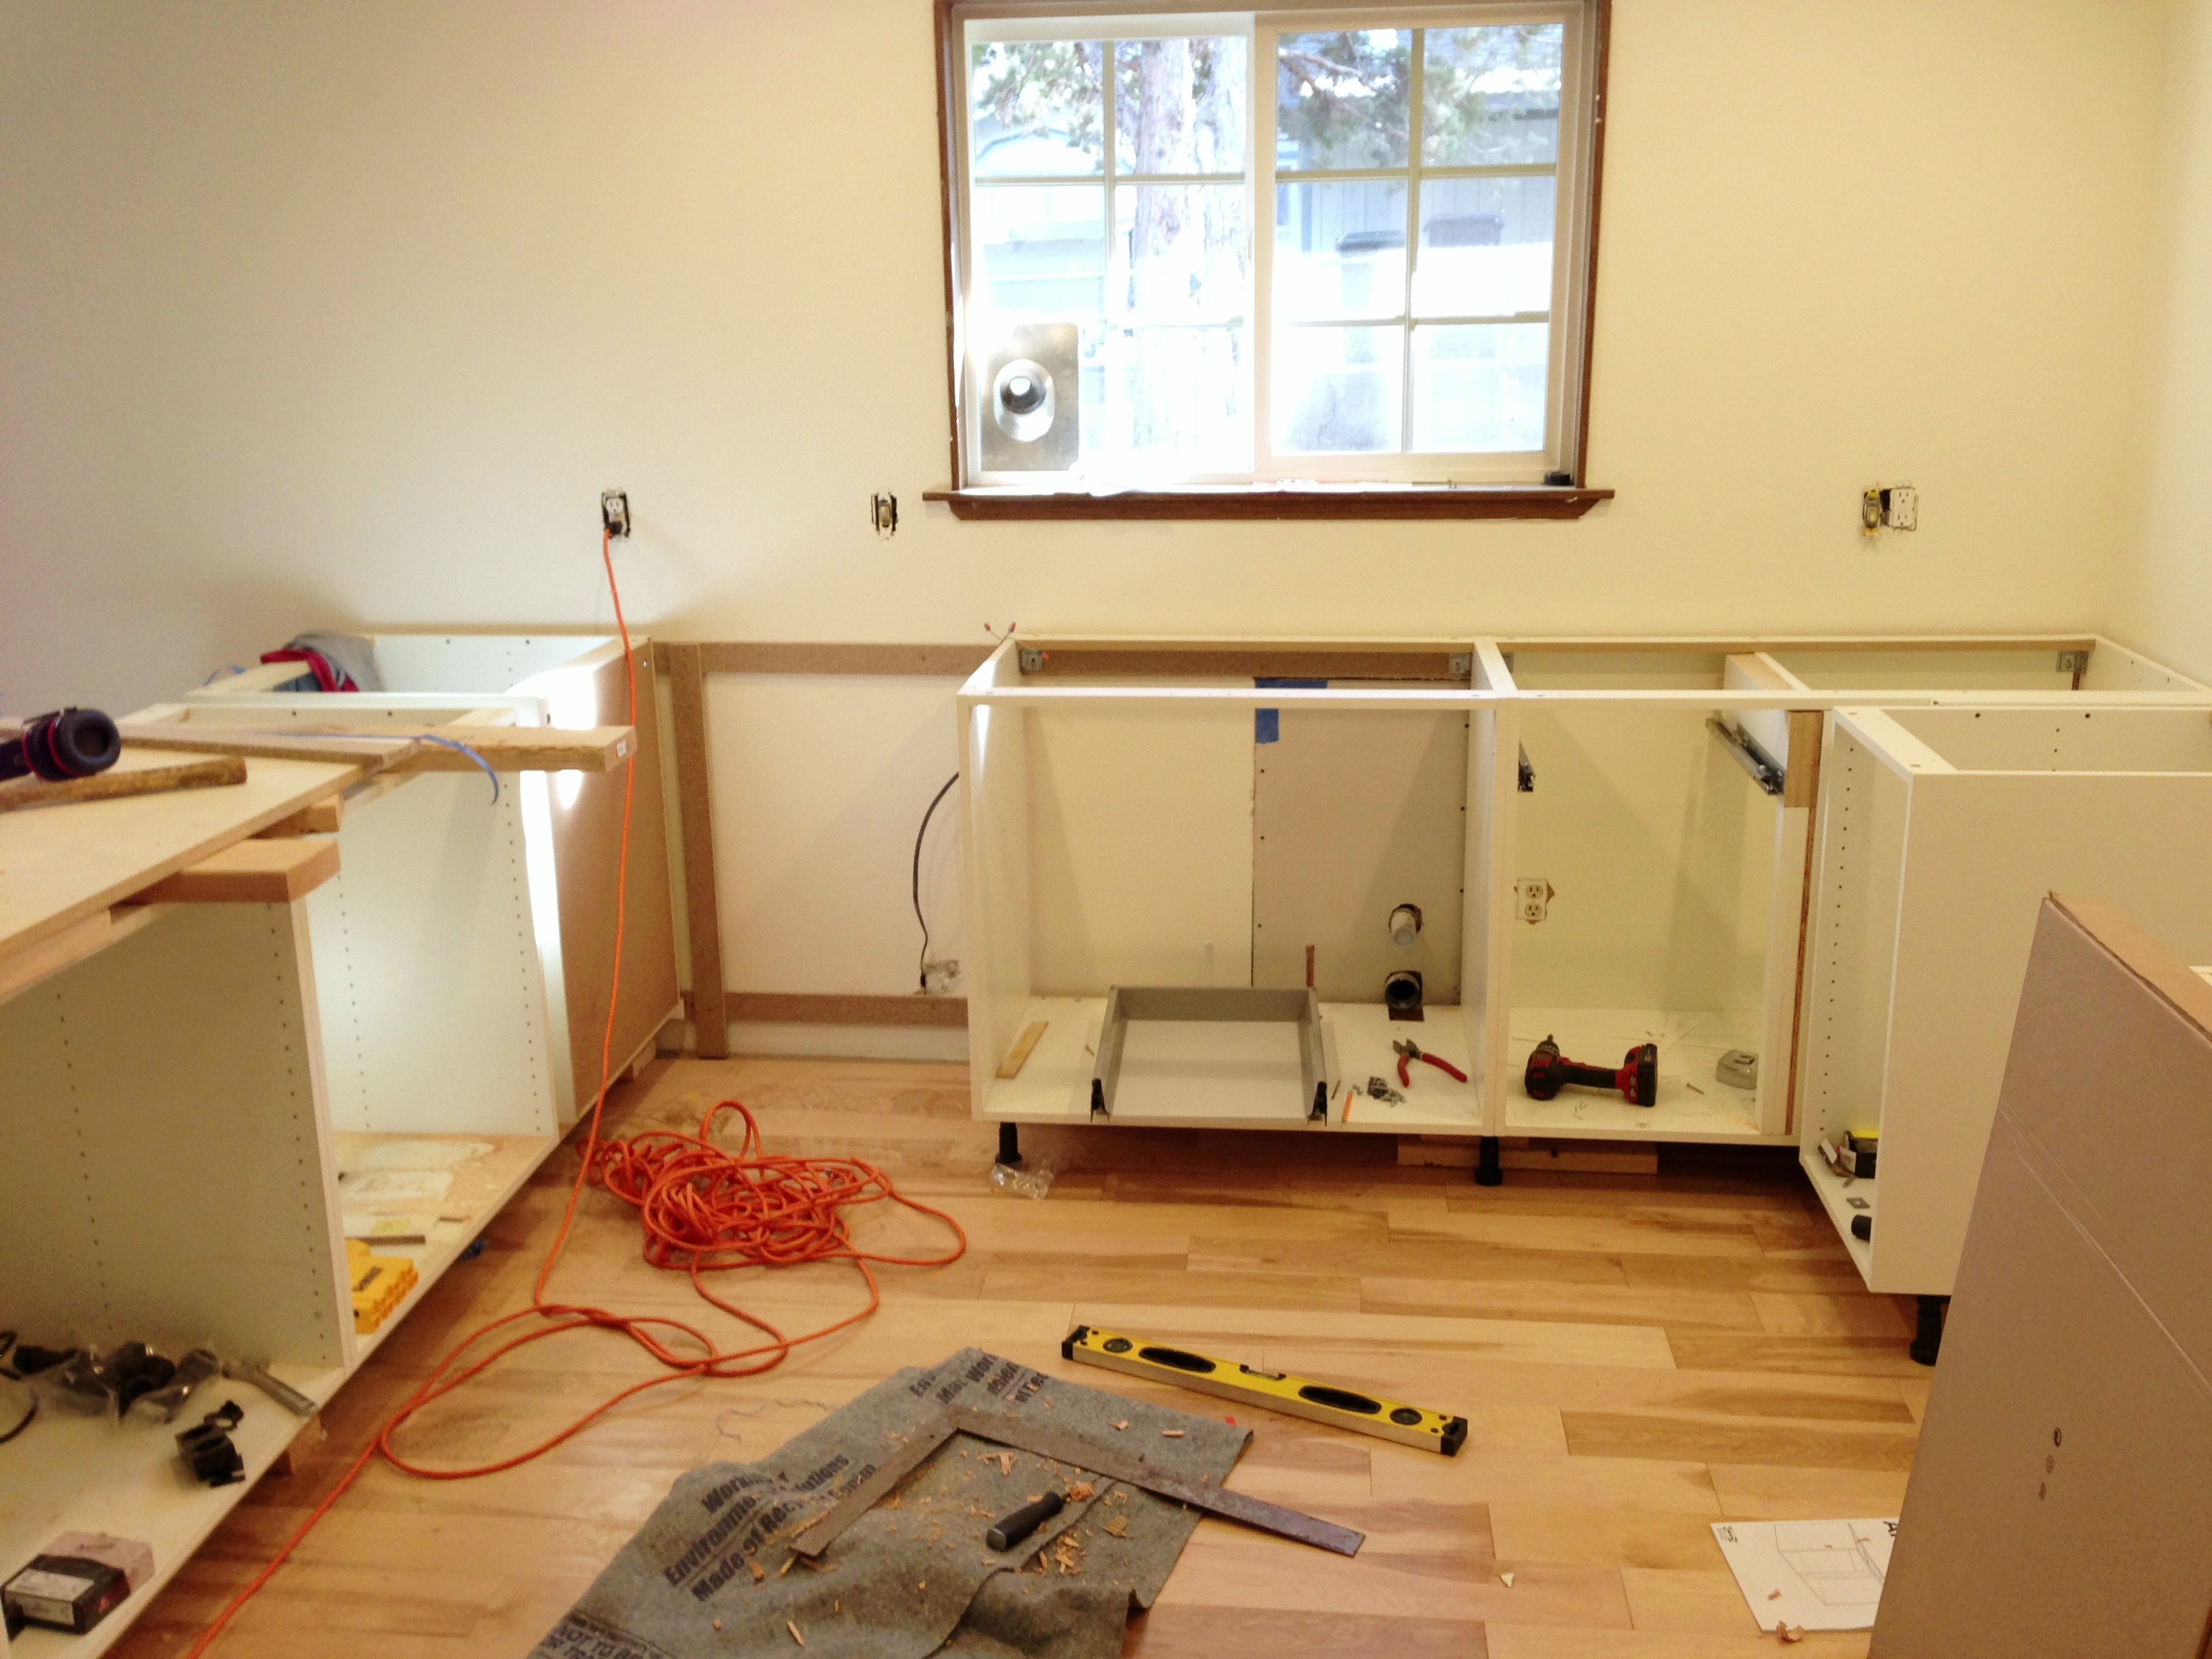
We chose IKEA cabinets after stellar reviews from friends and reading a lot online about their impressive durability and affordability. We took a marathon trip to Portland to choose our surface (Abstrakt), which is a story in and of itself. (Let me know if you’re wondering why we chose the glossy white — I could go on.) Then, we found IKDO.
I recommend this service highly. IKDO is an online kitchen design firm that takes your submitted room measurements and sketches, and creates precise plans for your new IKEA kitchen — including a complete parts shopping list, down to the last hinge. The plans include elevations and 3D renderings from every angle. You get one design modification for free. And they do it in 24 hours for $100. I can’t tell you how many headaches and six-hour round trips to IKEA this saved us. Thumbs up, grade A recommendation.
After a few tweaks (just where would we include a recycling/trash center? Are we sure about open shelving?), the spouse printed out the IKDO plan and parts list, flew to Portland, rented a truck, and hauled home our kitchen. He spent about a week, tackling it after hours, getting the lowers fully installed. This included creating his own custom base out of lumber instead of the stock IKEA feet. It also included a modified box for the blind corner.
A major improvement came from moving the peninsula into the dining space two full feet from the original. It makes the kitchen feel so much bigger.
When the boxes were in, it looked like this:

Installation of the IKEA Abstrakt lower cabinets begins.

Boxes for the peninsula installed.

IKEA boxes installed. Sink cabinet centered under window, yesss!
Deep breath in. Deep breath out. In part III, we’ll find the finish line. Stay tuned!