Kitchen follow-up: the pantry

It’s been a little over a month of living with our kitchen, up and running — hard — in our daily lives.

We use our kitchen, and I was curious to see where the clutter would gather. How the surfaces would hold up. If the gooseneck faucet would have splashback issues. Whether one of our new drawers could withstand the weight of a dozen vintage Pyrex bowls, two waffle irons, and five serving trays.

So far, so good. Last night, we rolled out fresh tortilla dough on the laminate countertop–and it performed beautifully. The stainless appliances aren’t streaking or smudging (relief!). The evenness with which the electric stove bakes a cake is a thing of beauty, and the continuous grill across the gas range is soooo helpful when you’re playing musical pots and pans for a dinner for eight. And if I ever questioned a single vs double-bowl sink, I never will again.

In the Big Reveal post, we skipped over the pantry. And this pantry deserves some attention, because I swear it’s got magical properties. It never seems to fill up. We reduced the pantry size by more than half, and I can still store all of my staples plus weekly dry goods in here, and feel no clutter.

Remember, we started with this:
1965 accordion door pantry

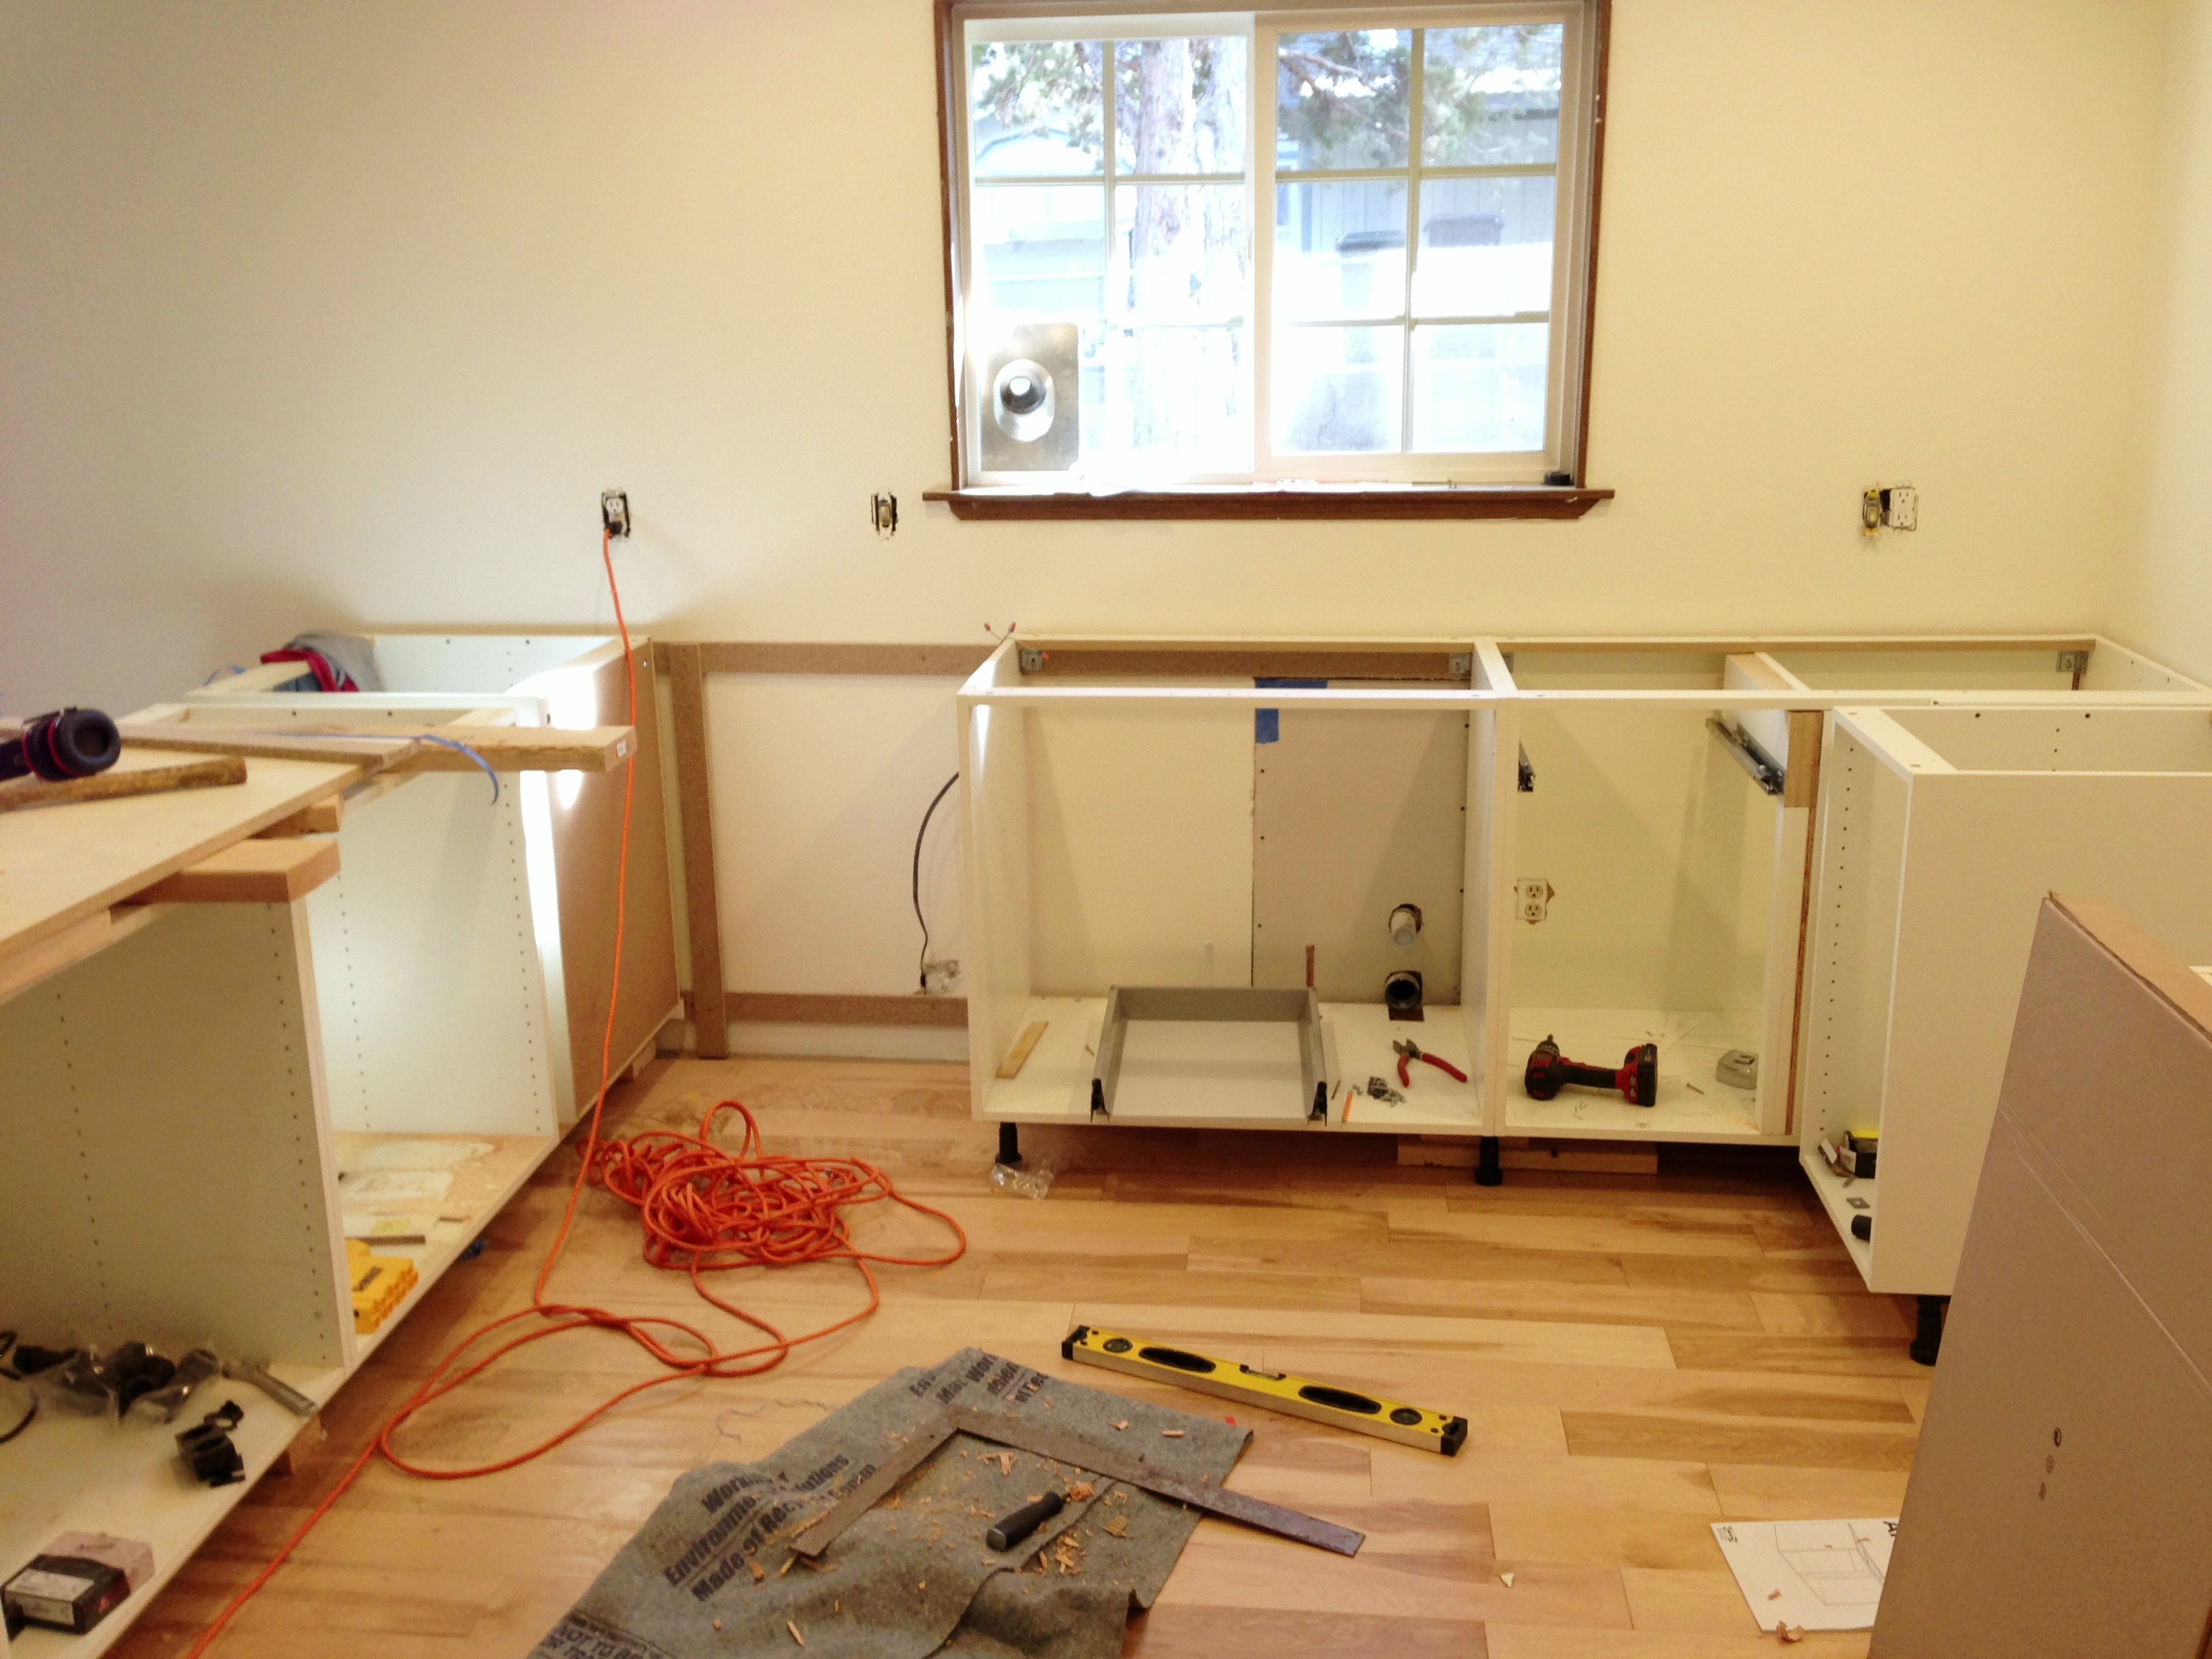
After removing the horrid accordion doors, we ripped out the shelves, knocked out the back wall, and pushed the whole space back about a foot. This meant losing closet inches in the adjacent bedroom. (We then restored those bedroom closet inches with new framing, sacrificing some bed space — gain a foot here, lose a foot there). It also meant the pantry would have an odd L-shape, because the furnace is located directly behind the back left corner, but it would increase the overall depth of the shelves — and it would let the fridge nook hold a standard-depth fridge, if necessary. Mid-stream, it looked like this:
pantry phase 2

On our first attempt at building pantry shelves, we went with plywood — inexpensive, large enough sheets to cut out the odd shape we needed. But we cut exactly one sheet before I confessed how much I would hate returning to painted shelves. I lived with painted shelves for seven years. Everything sticks to them, no matter how long the paint cures. They chip, get gooey, and suck to clean. Back to Home Depot went the spouse, for sheets of white MDF.

We made an L-shaped template, decided on shelf heights, attached the support ledgers, cut the shelves, and installed. There was some caulking and possibly a few curse words. We built and hung the over-fridge cabinet (aka, The Liquor Library).

And then, oh wouldn’t it be nice to have the microwave hidden? Wiring an outlet inside the pantry, no big deal, you go ahead honey, I’m just going to make an iced coffee …

Of course, he totally did it. And then it looked like this:

Pantry phase 3

One of these days, we’ll paint the unfinished door. Voila!

Kitchen update

I’m starting to bite my nails. (Well, I always bite my nails, but I’m biting with more … assertion, these days.) We are three weeks out, people! The spouse is a true hero — several late nights this week, just him and the IKEA manuals, power tools and a whole lot of Rage Against the Machine.

The contractors cleared out today — gigantic pile of tools and equipment, and a whole ton of dust and debris, GONE. They did a great job, but we’re ready to claim our space and all of the remaining projects that come with it. Before they drove away, I made them carry our orphaned toilet out of the kid’s future bedroom and scrub off a crazy, thick layer of splattered wall texture goo. We need to reuse that toilet, fellas. It’s the little things.

I thought I might hold back these progress photos, but you guys. I’m starting to get excited. Look at these before-and-afters. Oh, heck yes:

peninsula before

peninsula phase 2

The angle on these above shots isn’t identical (I was able to stand inside the new refrigerator nook to take the second one — more on that below). But, you can see that we gained a ton of space by pushing the peninsula out into the dining area. Also — notice how the sink used to be bizarrely off-center from the window? No way. That could not stand, man. It made my weird spatial-alignment sensitivities go haywire. Fixed.

I haven’t yet mentioned the pantry. It was much worse than this before photo leads you to believe — cracked and broken accordion doors, screwy shelving. It did offer a lot of storage, but it also offered a great place to relocate the fridge. This means significantly increased counter, cabinet, and butt space. We think the upgraded cabinet solutions will make up for the loss of shelving, and we did retain a smaller pantry (on the left, bottom photo — it still needs shelves):

pantry beforepantry phase 2

And then. AND THEN! There’s this:

kitchen view before

kitchen view phase 2Open, light, full of personality and functionality. It’s starting to take shape.

Can I get an amen?

In the spirit of celebration and back-patting, I will not list all of the things we still have to do before move-in day. Instead, here’s the (almost certainly incomplete and in no way representative of actual effort) checklist of everything accomplished to reach this stage of the kitchen reno:

  • Ripped out cabinetry, appliances, and soffits
  • Ripped out carpet and Pergo
  • Tore out and reconfigured pantry space to relocate fridge (we lost some bedroom closet space, but restored it by framing out an extra several inches into the bedroom)
  • Traced circuits, relocated various outlets and switches, installed can lights, added electrical to the fridge space, added a 240-volt circuit for the oven
  • Rerouted plumbing in order to center the sink under the window; plumbed the fridge space
  • Extensively repaired drywall, taped, mudded, patched, and textured
  • Skim coated the ceiling to cover up the popcorn (especially necessary since the kitchen didn’t have a popcorn texture, and without the soffits and upper cabinets the division in the ceiling line was gone)
  • Chose paint. Chose a different paint. Polled the family and chose yet a third color. Painted.
  • Chose the wood flooring. Chose again. And again. Entered a long period of doubt and indecision. Bought wood flooring. Installed wood flooring. Mourned our choice. Started to grow fond of it.
  • Designed an IKEA kitchen, sent the spouse by plane to Portland, where he rented a truck and did the heroic IKEA thing to bring back a pile of flatpack.
  • Built lower cabinet boxes, including a custom corner unit.

How’s that for a progress report? [knucks]